
The shift from crisp autumn afternoons to freezing winter nights quickly exposes a home’s hidden vulnerabilities—a draft slipping past a window sash, a chilly hallway, or indoor air so dry it sparks static electricity. Preparing your living space for colder months involves far more than pulling heavy quilts from storage and lighting candles. True cold-weather comfort happens at the intersection of intentional interior styling and proactive seasonal upkeep.
Addressing core mechanical systems and vulnerable surfaces early protects your budget, while thoughtful decor updates cultivate a warmer, calmer environment. Approaching winter preparation holistically keeps your rooms resilient and energy-efficient. Consider these five pillars to your winter preparation: stabilizing indoor airflow, safeguarding hydronic systems and plumbing, upgrading lighting and circuit safety, protecting wood floors and walls, and preparing kitchen surfaces and guest spaces for hosting.
Stabilize Indoor Airflow and Warmth Before the First Freeze
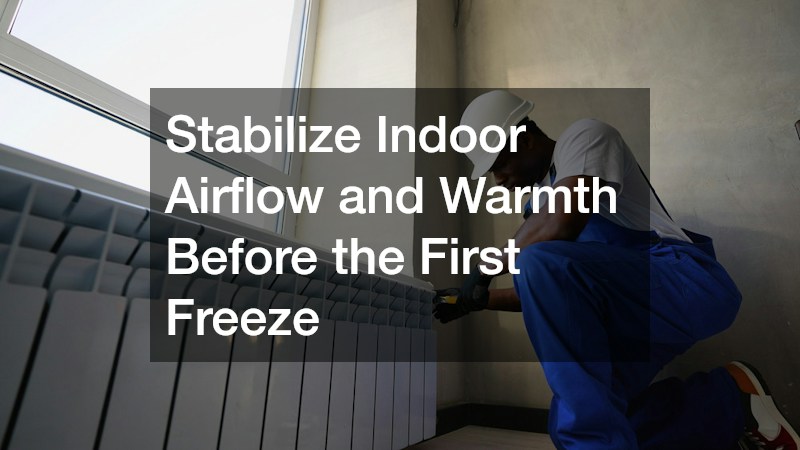
A comfortable winter home starts with balanced heat distribution. Before temperatures plunge below freezing, optimize how warm air circulates. Many homeowners blame weak wall insulation for chilly spaces, rather than obstructed airflow, poor thermostat scheduling, or unsealed window perimeters.
Use ceiling fans to equalize room temperatures:
- Reverse the blade rotation: Flip the toggle switch on the motor housing so blades spin clockwise.
- Run the fan on low: A slow clockwise spin creates a gentle updraft that pushes warm ceiling air down along the walls without creating a draft.
- Clear supply registers and return grilles: Seasonal furniture rearranging often blocks floor vents or cold-air returns, driving up utility bills and straining equipment.
Your thermostat and window treatments work together. Programming a smart thermostat can trim winter heating bills by roughly ten percent without sacrificing comfort. Set your daytime target to 68 degrees Fahrenheit while awake, then schedule an automatic setback of seven to ten degrees overnight under warm bedding or during empty weekday hours. If an air-source heat pump heats your home, use smaller setbacks of two to three degrees so the system avoids engaging costly electric backup strips.
To keep conditioned air inside, seal gaps around window frames. Apply compression weatherstripping along worn sashes, install door sweeps beneath drafty thresholds, and apply clear, heat-shrink insulation film over older panes. Soften these weatherproofing steps by hanging heavy linen or wool-blend drapes wider than the window casing. Open the panels during sunny afternoons for passive solar warmth, then draw them shut at dusk to trap an insulating air pocket against the glass.
Finally, inspect forced-air equipment before peak demand arrives. Dry winter air circulates extra lint and dander, so check your filter’s MERV rating and replace it every thirty to sixty days. Watch early heating cycles for uneven room temperatures, rapid short cycling, or a dusty odor lingering past an hour. Scheduling routine HVAC service in early autumn ensures technicians clean burners, lubricate motors, and verify airflow before emergency rates apply. If you spot serious red flags—such as a yellow pilot flame instead of a crisp blue cone, loud rattling from the blower cabinet, or a tripped safety switch—arrange for local furnace repair right away to prevent a mid-winter outage.
Safeguard Hydronic Heat Systems and Exposed Pipes Against Deep Freezes

Homes warmed by hot water radiators or radiant floor loops need targeted prep before deep freezes arrive. Unlike forced-air systems, hydronic loops rely on steady water pressure and unobstructed circulation to heat evenly.
Over summer, air bubbles collect inside cast-iron radiators, rising to high points and blocking hot water circulation. If the top half of a radiator feels lukewarm, trapped air is stealing warmth:
- Bleed each radiator methodically: Shut off the boiler and let the water cool slightly. Insert a radiator bleed key into the top valve, hold a cup and rag underneath, and turn counterclockwise until air hisses out. Close the valve once a steady trickle of water appears.
- Verify cold-fill pressure: Check the gauge on your boiler. Most residential homes operate cleanly around 12 to 15 PSI when cold.
- Inspect for mechanical wear: Rumbling inside the heat exchanger, mineral crust around valves, or pressure readings dropping toward zero indicate a failing expansion tank or seal. Calling a specialist for boiler repairs in autumn keeps your system running safely before deep winter arrives.
Domestic water lines demand careful winterization. Because water expands roughly nine percent as it freezes, ice blockages generate enough pressure to split fittings wide open. Focus on unconditioned spaces where cold air gathers, including crawlspaces, rim joists, unheated garages, and plumbing inside exterior walls.
Start outdoors by disconnecting garden hoses and storing them indoors—even frost-free spigots can freeze and rupture inside the wall if a connected hose traps water in the stem. Close interior shutoff valves feeding outdoor sillcocks and open exterior bleeder caps. Inside, wrap exposed supply lines in basements and crawlspaces with foam pipe sleeves. During arctic cold snaps, leave vanity and kitchen sink cabinet doors slightly ajar overnight so warm air circulates around exterior-wall plumbing. Establishing a relationship with a dependable plumbing company ahead of severe weather also helps: they can test your sump pump’s battery backup, label main shutoff valves, and respond quickly during a freeze emergency.
To reinforce your home’s thermal envelope visually, pair mechanical prep with insulating textiles. Install wrap-around curtain rods that curve back into the wall at both ends, eliminating side gaps for drafts, and place weighted wool or canvas draft stoppers along chilly entry doors.
Upgrade Interior Lighting and Circuit Safety for Shorter Days
By November, early sunsets dramatically shift the mood inside your home, affecting daily energy, visual comfort, and how wall colors and furnishings look at dusk. Adjusting your lighting scheme for winter transforms dim rooms into welcoming evening sanctuaries while keeping circuits safe.
Many homes retain cool-white bulbs. Under gray winter skies, bulbs rated between 4000K and 5000K cast a bluish glare that exaggerates shadows and flattens warm wood tones:
- Transition to warm-spectrum LEDs: Swap cool overhead and lamp bulbs for high-CRI LEDs rated between 2700K and 3000K, echoing late-afternoon sunlight to enrich undertones throughout the room.
- Build three layers of light: Combine dimmable ambient ceiling fixtures with focused task lighting—such as articulated brass reading lamps beside sofas—and low-glare accent lighting.
- Tuck light into dark corners: Place cordless rechargeable table lamps on bookshelves, mount plug-in picture lights above artwork, or run warm LED tape lighting inside glass-front cabinets.
Adding lamps, heated throws, and seasonal displays increases demand on branch circuits, requiring a safety audit. Portable electric space heaters require special caution. A standard portable heater draws 1,500 watts on high, consuming roughly eighty percent of a 15-amp circuit’s safe capacity. Never plug a space heater into a power strip, surge protector, or extension cord, which can overheat and melt under sustained loads. Plug heaters directly into a wall receptacle, keep combustibles at least three feet away, and unplug the unit whenever you leave the room.
Before hanging exterior garlands, porch lanterns, or pathway lights, test every outdoor GFCI receptacle by pressing its test button and confirming power cuts off immediately. Use outdoor-rated cords and keep plug connections elevated off snow-prone surfaces. Inside, watch for warning signs as seasonal usage climbs—lights dimming when appliances start, switches or outlet plates feeling warm, or breakers tripping repeatedly. Have a certified electrician inspect aging breaker panels, loose receptacles, or flickering circuits before holiday loads peak. If you want to upgrade two-prong outlets, install smart rotary dimmers, or add dedicated circuits for a workshop or supplementary heater, working with experienced local electrical contractors ensures every update meets modern safety codes.
Protect Hardwood Floors and Refresh Walls Against Dry Winter Air

When heating systems run continuously for months, indoor relative humidity routinely drops down to twenty percent or lower. Natural timber constantly exchanges moisture with indoor air. In parched winter air, hardwood floorboards release moisture and shrink across their width, opening gaps between planks, loosening joints, and triggering loud squeaks underfoot.
Stabilizing indoor moisture protects your floors and comfort:
- Track humidity with digital hygrometers: Place small digital hygrometers in your main living room and upstairs hallway to monitor actual indoor conditions.
- Hold relative humidity between 35 and 45 percent: Run a whole-home humidifier integrated into your ductwork, or operate evaporative console humidifiers in central zones to minimize plank shrinkage, curb static shocks, and help indoor air feel warmer.
- Defend entryways against salt and slush: Wet boots track in rock salt and grit that act like sandpaper on polyurethane finishes. Lay down a washable flatweave wool runner inside every exterior door, paired with rimmed boot trays filled with river pebbles to drain melting snow.
If your hardwood floors already look dull or scratched along main walkways, late autumn is an ideal window to schedule wood flooring services for a dustless screen-and-recoat. Unlike full sanding, a screen-and-recoat lightly abrades the existing topcoat and applies a fresh layer of commercial-grade polyurethane, sealing vulnerable seams against winter moisture and holiday foot traffic.
Winter is also a rewarding time to refresh tired interior walls. Cold-weather light tends to make stark, cool-undertone whites appear sterile or slightly blue. Warm up living rooms, dining spaces, or bedrooms with creamy alabaster whites, muted terracotta, warm taupe, or deep botanical greens that feel cocooning under evening lamplight. Because windows stay closed during colder months, choose zero-VOC or low-VOC paints to keep indoor air fresh. Enlisting professional painting services guarantees thorough surface prep—caulking hairline drywall cracks caused by seasonal framing movement and applying durable satin or semi-gloss enamels on baseboards and door casings.
Prep Kitchen Surfaces and Guest Spaces for Cold-Weather Hosting

Cold weather draws household life into the kitchen, where multi-course dinners put surfaces and appliances to the test. Preparing your kitchen ahead of hosting keeps prep zones organized and protected from avoidable wear.
Natural stone surfaces require periodic maintenance to resist stains from acidic spills and cooking oils. Before holiday cooking shifts into high gear, perform a ten-minute water-drop test on granite, marble, or soapstone countertops. Pour a quarter-sized puddle of clean water onto the busiest prep area and wait ten minutes. If the water stays beaded cleanly on top, your barrier is intact. If the stone darkens and absorbs moisture, clean the surface with a pH-neutral stone cleaner and apply a penetrating sealer.
Keep busy cooking zones clutter-free with practical styling upgrades:
- Anchor prep stations with oversized butcher blocks: A thick end-grain walnut or hard maple cutting board left on the island protects stone edges from heavy Dutch ovens while introducing warm wood tones.
- Corral daily essentials on trays: Group olive oil cruets, pepper mills, and wooden spoons on a brass or stoneware tray beside the stove to contain drips and free up clear workspace.
- Add warm task illumination: Install plug-in or hardwired under-cabinet LED strips so chopping areas stay brightly lit on dark winter evenings.
Finally, inspect guest bedrooms, finished basements, sunrooms, and attic suites. Turn on electric baseboard heaters, radiant floor mats, or ductless mini-split zones several weeks before guests arrive to confirm they reach set temperatures smoothly. If a secondary zone blows cool air, displays an error code, or fails to ignite, arrange for prompt heating repair ahead of holiday arrivals. If your home features a wood-burning or gas fireplace, inspect the chimney damper with a flashlight to verify that it opens fully and locks cleanly before lighting your first fire. Complete your hosting prep by walking every level of the house to vacuum dust from smoke alarms and install fresh batteries in every carbon monoxide detector, ensuring reliable protection.
Preparing a home for colder months does not require an exhausting weekend marathon or a complete interior overhaul. When you view seasonal decor and home maintenance as two halves of the same goal, every practical step supports a more comfortable living space. Sealing drafty sashes keeps heavy drapes still; balancing indoor humidity keeps hardwood planks quiet beneath thick wool rugs; and upgrading warm layered lighting turns early winter dusk into the best part of the day.
Rather than tackling the entire checklist at once, divide these projects across two or three relaxed weekends. Spend your first afternoon testing thermostats, swapping air filters, and reversing ceiling fans; dedicate the next weekend to bleeding radiators, insulating vulnerable pipes, and refreshing entry drop zones; and wrap up by tuning your lighting, sealing kitchen surfaces, and testing safety detectors. With your mechanical systems inspected and your living spaces thoughtfully layered, you can settle into winter knowing your home is warm, protected, and ready for winter weather.